


Is using waterproof grout really necessary for construction?
Waterproof grout not only helps to complete the tiling surface but also protects the construction from water and moisture penetration. However, is choosing waterproof grout really necessary for every construction? Let's explore with LEMAN why this product is increasingly popular in construction and repair, along with the benefits it brings to both the construction and the user.

Learn about the importance of waterproof grout in construction
1. What is waterproof grout?
Waterproof grout is a special type of adhesive, designed with superior waterproofing ability. It is often used to fill the joints of tiles after they are installed or laid. This product not only has the effect of bonding the tiles together but also helps prevent water from seeping through the joints, protecting the surface from water seepage, mold and other problems.
The main ingredient of waterproof grout is usually a mixture of cement, polymer and special additives. These ingredients help create a durable, effective waterproof mortar layer, suitable for many different types of surfaces such as ceramic tiles, granite tiles, natural stone, or artificial stone.

Waterproof grout helps fill the tile joints after tiles are installed or laid.
2. What is the difference between waterproof grout and regular grout?
Waterproof grout is different from regular grout in its ability to prevent water from penetrating into the joints, helping to protect the tiling surfaces from water seepage, mold and other damaging agents. Here are the distinct differences between the two types of grout:
2.1. Waterproofing ability
Waterproof grout: Designed with special ingredients such as polymers and waterproofing agents, helping to create a waterproof protective layer, minimizing water seepage into the joints, especially important in wet areas such as bathrooms, kitchens or outdoors.
Regular grout: Although it has good adhesion, it is not optimized for waterproofing purposes. Therefore, it is easily affected by the effects of water, leading to peeling or mold over time.
2.2. Durability and water resistance
Waterproof grout: Excellent water resistance, protects the grout joints from peeling, fading or mold, keeping the construction longer and more durable. This product also has good load-bearing capacity, helping to maintain the durability of the construction over many years of use.
Conventional grout: Easily damaged when exposed to water for a long time, leading to peeling or mold in wet areas.
2.3. Application
Waterproof grout: Suitable for use in areas with high humidity or direct contact with water, such as swimming pools, bathrooms, kitchens or outdoor spaces. They not only maintain the structure of the tiles but also protect the surface from the effects of water.
Conventional grout: Mainly used in dry areas or places with little contact with water. They are suitable for indoor spaces such as living rooms, hallways or areas that are not often wet.
2.4. Construction characteristics
Waterproof grout: In addition to being easy to apply, waterproof grout also helps protect the surface of tiles and grout during use. This product is also easier to apply and maintain than conventional grout thanks to its superior waterproofing properties.
Conventional grout: Requires regular maintenance and can be difficult to apply in humid environments. If not properly cared for, the grout can quickly peel off or crack due to water seepage.

The difference between waterproof grout and regular grout
3. Why is waterproof grout necessary for construction?
Waterproof grout is an indispensable element in construction projects. Here are the reasons why waterproof grout is necessary for your project:
Protect the project from water seepage: Water seepage is one of the main causes of damage to construction structures. Using waterproof grout helps prevent water from penetrating through the tile joints, protecting the entire project.
Reduce the growth of mold: Water and humidity are ideal conditions for mold growth. Waterproof grout helps prevent the appearance of mold, protect the health of users and maintain the aesthetics of the project.
Increase aesthetics: Waterproof grout can improve the beauty of the tile surface, making the tile joints more even and cleaner.
Waterproof grout plays an important role in preventing water from entering the construction.
4. Simple instructions for applying waterproof grout
Applying waterproof grout is not too complicated, but requires meticulousness and technique to achieve perfect results. Below are detailed instructions to help you apply effective tile grout, protecting the project for a long time and durability.
4.1. Prepare tools and materials
Waterproof grout: Choose the type of grout suitable for the project requirements.
Putty or glue scraper: To be able to apply the grout evenly and smoothly.
Grout brush tool set: You can use a sponge or a small brush to clean the grout.
Container and glue mixer (if needed).
Clean cloth: To wipe off excess glue after construction.
2. Clean the tile surface
Before applying tile grout, you need to clean the tile surface and the joints. The tile joints need to be dry, clean and free of dirt or grease. Use a soft cloth or brush to remove any dirt and leave a clean surface. If the tiles are new, make sure the tile adhesive is completely dry before grouting.
3. Mix the grout
Depending on the type of grout you are using, follow the manufacturer's instructions for mixing the grout. Typically, waterproof grout will be mixed with water in a specific ratio. Mix until the grout reaches a moderate consistency, not too thick or too thin. You will need to use a mixer or brush to ensure the mixture is even and there are no undissolved lumps.
4. Apply the grout
Step 1: Use a sponge or grout brush to pick up a sufficient amount of grout and start grouting the grout. You should work from top to bottom to avoid getting grout on the tiles. Make sure the grout is pushed deep into the joints.
Step 2: Rub the glue evenly, avoiding getting glue on the tile surface. If glue gets on the tile surface, use a clean cloth to wipe it off immediately.
Step 3: After rubbing the glue, use a damp sponge to clean off excess glue on the tile surface. Be careful not to let the glue dry on the tile surface because it will be difficult to clean later.
5. Let the glue dry and set
After completing the grouting, let the glue dry naturally according to the manufacturer's specified time. Normally, waterproof grout needs 24 to 48 hours to dry completely, depending on environmental conditions such as humidity and temperature. Avoid using the newly constructed area during this time so that the glue can adhere and dry best.
6. Check and finish
Once the glue has dried, check the grout joints to ensure that the glue is evenly covered and does not crack or peel. If you find unfinished areas, you can rub a thin layer of glue into the remaining gaps to ensure aesthetics and waterproofing function.
7. Maintenance after construction
After construction, to increase the durability of the glue and ensure long-term waterproofing, you should avoid letting water strongly impact the grout area for the first few days. In addition, you need to regularly clean this area to remove dirt and keep the surface clean.

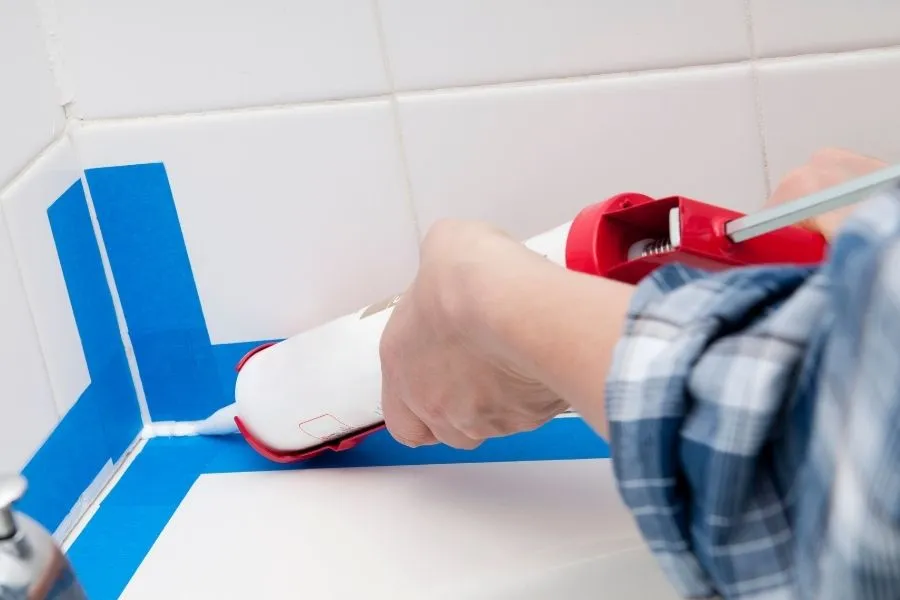
Simple steps to apply waterproof grout
Waterproof grout not only helps protect the construction from water and mold but also increases the durability and aesthetics of tile surfaces. Proper construction will help maintain the beauty of the construction for a long time, avoiding damage due to humidity. Choose high-quality waterproof grout products like LEMAN to ensure optimal protection for the construction.
You may be interested
- Common Mistakes When Using Concrete Hardener Additives
- What is Concrete Surface Hardener?
- What is concrete floor hardening?
- Is Exterior Waterproof Paint Effective for Coastal Homes?
- Things to Know Before Buying Concrete Surface Hardener Additives
- Common Mistakes in Roof Waterproofing and How to Avoid Them


.jpg)


